
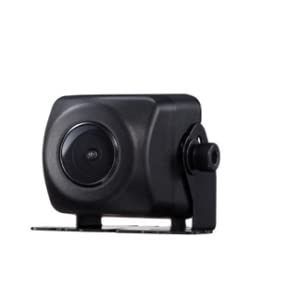
The adapter of the backup camera :
The kit also contains the antenna adapter you’ll need to connect your chevy backup camera supplier factory antenna to the photo. Another wiring harness over here that they’ll take a look at later. Now there are detailed installation instructions on the pack website. So you’re going to go over there and take a close look at those before you get started trying to wire any up to the harness. There are a few different ways to make all of the connections between the pack harnesses and the photo harness. Now electrically, the best way to do this is to solder all the wires together and put heat shrink tubing over each wire after it’s Soldered.

If you are not going to do that, just in case you want to take this thing apart or in case you get something hooked up wrong Instead. You will use these automotive-style barrel connectors to see Backup camera supplier they’ll be on the menu. If you can order them on amazon or get them at your local auto parts store, and as you’ll see in a minute, there’s just a male and a female end here that crimp onto either end of the wire. If you can connect or disconnect them as needed, it’ll only make you through some of this. But you’re going to remove these pre-stripped ends from each of the wires.
You’ll probably put all the males on the to-do Side to crimp one of your terminals onto each one. You’ll put all the females on the pack side, not for any reason. So you’ve got all the barrel connectors crimped onto the wires and connected up where they’re supposed to go to figure out. Where everything needed to go, they used the instructions from the packing kit and cross-referenced them to the wiring char.t that was wrapped around the harness now. Because this is a universal kit, you do have a few spares that aren’t used with Your particular vehicle, so in those cases, you have them capped off.
Instruction of backup camera :
So that you don’t have any shorting issues, the next thing you need to do is set the position of Backup camera supplier of these switches on the Side of the module now in the pack instructions. There is a chart you to which one of these needs to be turned on and which one needs to be off. Now in your what is considered another brand radio from the instructions. So it would help if you toggled switches one, two, and three on or Down.
Suppose your start was plugging in the white connectors on the pack harness into the packing box now. These are all different size connectors and can only fit in one of the receptacles, except the two receptacles over here are the same size. If you look at the bottom of the unit, one of the receptacles is used for a non-amplified system. The other one is used for an amplifier, so since you have an amplifier in your car, you’re going to plug this two-pin plug into this receptacle. That’s on the wiring harness plugs into the two-pin receptacle on the chime module.
So for right now, done making connections to the wiring harness; you are going to set all this aside, bring in the radio, and start putting on the mounting brackets. So in your case, you’re going to use the double din brackets supplied with the toto radio, and you’re going to mount them on either Side. Each one is stamped with which Side it goes on. Now the plates are keyed to fit around the plastic brackets.