
A Terrarium Workshop Singapore is comparable to a fishbowl, but instead of fish, it houses plants. It can be made in almost any glass container. It’s designed to resemble a miniature garden or forest, complete with its little world. For example, because succulents (including cactus) require very little water, you could plant them all.

Requirements-
- Choose a glass container that has a lid. Your container is crucial in this process because it determines the types of plants you’ll need, where you’ll put it, and how it looks in the end.
- Choose your plants carefully. Plants that thrive in humid environments, such as mosses, ivies, ferns, air plants, and orchids, should be considered. It’s nice when the colors of the different plants contrast rather than being all the same tone.
- Drainage Rocks are a type of rock that is used to help with drainage.
- Activated Charcoal to keep the roots from rotting when there is too much water.
- The soil. If you’re using plants that thrive in humid environments, you’ll want to use tropical soil.
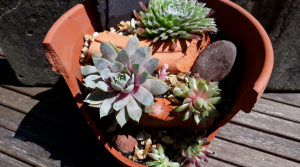
- Once the plants have been planted, add decorative rocks, shells, or glass to the top layer.
- If you want to wrap some of the soil in moss, use it.
- Terrarium tools to assist you in layering, planting, and embellishing your terrarium.
Step 1: Add Drainage rocks
Begin by covering the bottom of your container with a thick layer of drainage rocks. To add some accent layering, you can use two different types of drainage rocks.
Step 2: Add Activated Charcoal
The activated charcoal is your second layer, placed before the soil. This layer is crucial in preventing roots from rotting when there is too much moisture in the soil.
Step 3: Place the plant in the container
Transfer your plants from their original containers, and depending on their size, you may need to cut them in half, thirds, or even smaller pieces to fit them into your container. In your terrarium, place the plants one by one on top of the charcoal layer. After you’ve placed the first one, add some soil all around it to help it stay in place in the container, and then repeat with the rest of your plants.
Step 4: Add soil inside the container
After your plants have been placed in the vessel, fill it with sufficient soil to reach the surplus roots and clefts between the plants and the glass walls. By tamping it down with your hand, get assured that your soil layer is equalized on all sides.
Step 5: Put Decorative rocks inside it
You can arrange to add decorative rocks, shells or glass to the top embellishing layer of your Closed Terrarium once all of your plants are in position, and the soil has been evenly distributed.
Step 6: Pour some water into it
Pour some water into your brand-new Closed Terrarium until you see the water gradually oozing out to the first layer of drainage rocks. Your terrarium will be nearly maintenance-free once the rain circle has been established. You can remove the lid for up to 10 minutes to allow new carbon dioxide to enter once a week. If the lid is extremely tight-fitting, this is even more important. Only water if compression has ended, the plants have begun to hang, or the soil appears dry.
Dig in the dirt and have fun now that you know how to make a closed terrarium! Make a lovely new living feature for your home or office that you can use all year.